|
The
Story of Our Patio |
The
patio was 2007's big project. Basically, we had what the team described as a series of patios not really working with each other too well. We also had a gravel garden which I really liked but a lot of that had to go to be made into a large square patio area for the table and chairs to stand on. We were hoping that the new patio would encourage us to eat outside more often if it became a better place to sit.
The overall design was a long time in the planning stage. The old patio was such an awkward shape that I was at a loss for a long time as to what to do with it. In the end, and after a couple of chats with Nik and a visit to Rock-Unique to choose the slabs and cobbles, I got out the graph paper and drew a general design with 4 distinct patio areas.
|
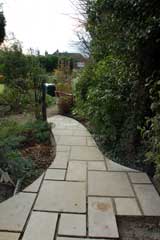
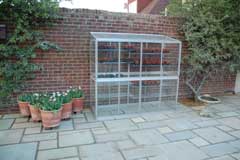
Patio One - this area which is near the garage/down the side of the house would be a work area with the greenhouse, water butts, washing whirligig thingy and bird feeders. The ramp that takes you to the garden would stay in place. |
|
|
Patio Two - this is outside the kitchen door and was to be a colonnaded walk (oak uprights) and also Jonathon's BBQ area. This would lead to steps which would take you into the main garden area. These two patios would be on the same level and simply divided by the oak posts and rope "fence". |
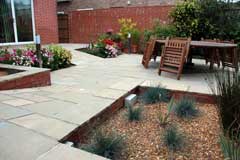
Patio Three - the area outside the patio doors would be squared off. This would be at the same level as Patios 1 and 2 but there would be no direct access from the kitchen patio as there would be a large flower bed in the way. |
|
|
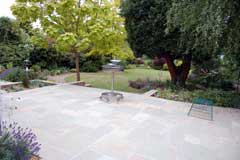
Patio Four - this would be the main new area and would be on part of the old gravel bed. It woud be a 5.5 metres square area where the table and chairs would go. This as to be at garden level and you would be able to reach it via ramps from both the kitchen area and the third area above. I was hoping this area would feel a real part of the garden as you would be surrounded by shrubs (hopefully without them encroaching too much). |
There were to be two lower level beds - one at either side of the ramp from the back room patio area - and two high level beds - the one mentioned in three above and another one at the other side of the kitchen patio ramp.
|
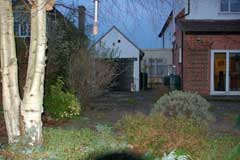
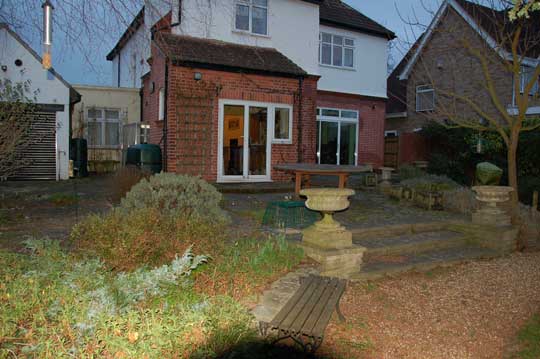
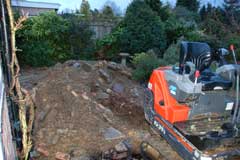
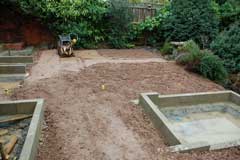
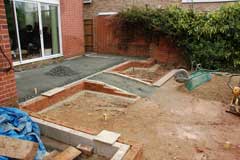
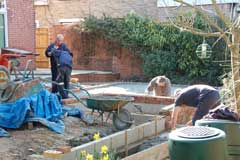
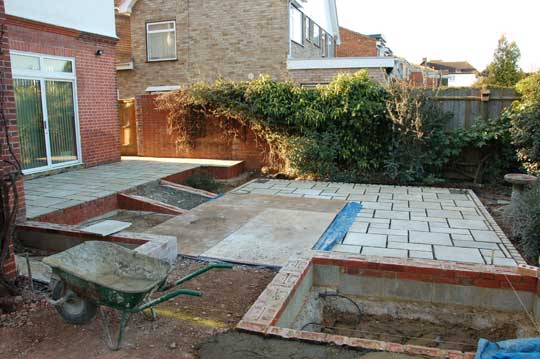
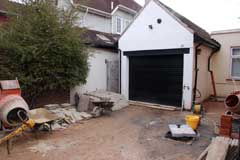
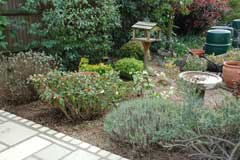
At the start, as you can see, there was a lot of crazy paving on the patio itself and plenty of rough edges. There were multiple levels with some of the levels being just a couple of inches different to their neighbour making them ideal to trip over! |
|
A general apology for the quality of the photos - I didn't see the patio in daylight during the first week so all the photos I took had to be "flashed". |
|
|
Day 1 and the team moved in. I was very nervous the night before they started - would it look OK? how many of the plants would survive? why was I letting them drain all 5 of my water butts having had such a drought ridden summer? etc etc but once they got there and started work I knew it would be fine. Just taking the crazy paving off made a huge difference. |
|
|
When I say fine that is as in OK rather than fine as in dry weather. It started to rain and the back of the house looked like a mud bath by the end of Day 2 (it still hadn't dried out when we left the country at the end of the first week to get away from it all!). I was waiting for the hippos to arrive as they would have loved to wallow in it. |
|
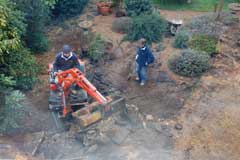
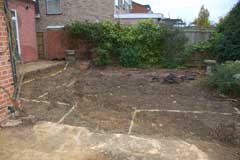
A major milestone in any project like this is when the yellow lines appear and you can start to see what the shape is going to look like. This happened on day 4 so progress was pretty swift. |
|
|
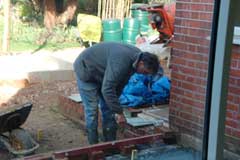
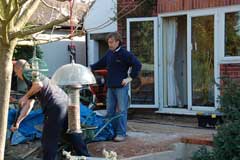
Day 5 (and the day before we were due to go to Madeira for a week's holiday) we had a meeting on site to finalise the layout (only minor tweaks required which was nice and a great relief to Richard who had been doing the work). It also gave Chris (electrician) and Paul (brickie) their first opportunity to understand in detail what they were going to be asked to do. Jonathon was in charge of lighting so he and Chris wandered off and discussed such things as horizontal washes (don't think we're having one of those), RCDs, LEDs, spot lights, switch boxes, waterproof external plug points and who knows what else (wirless broadband access I suspect) whilst Nik, Paul and I debated heights of beds, gradients of slopes, depth of upper patio etc.
Great fun even if the weather was pretty damp and I went on holiday full of confidence that it would look completely different in a week's time when we got back and knowing that, by then, the hard core base should be in, the shape established and Paul should have been able to start doing some of the brick work.
|
|
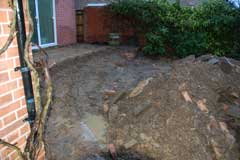
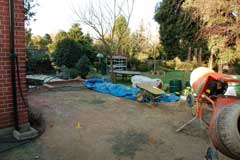
A week later and we returned home to continued mud. Apparently they'd had hail stones, thunder, lightning and lots of rain while we were away but progress had been made. The new drains were in so the rain from two downpipes would go into the drains rather than onto the floor - a big improvement.
|
|
|
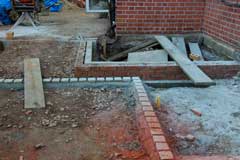
The shape was also coming together well. The ramps were now obvious, some of the hardcore was in place and Paul had started to do the brickwork |
|
|
|
The red hardcore apparently held the water too much so grey/blue hardcore was brought in to try and address the problem. The soil in our garden is clay so it holds water quite well enough on its own. |
|
|
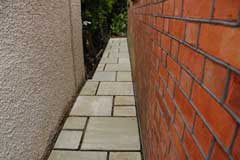
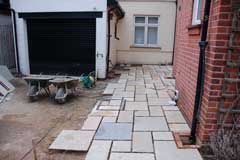
The first slabs to be put in place were those down the side of the garage. What an improvement on what was there before! The slabs are Morissca limestone and it was good to see the first few down. They would look even better once they were pointed up. |
|
Paul finished the brickwork round the two lower beds on the Saturday after we got back so Nik's team could start to lay the slabs outside the patio doors. Ideally I'd have liked the work area finished first so my greehouse could go back but that area was saturated so it needed to dry out before that bit could be tackled. |
We went off to Geneva for the weekend as I needed to be there for work on the Monday. |
At this point I had 3 concerns... |
The first was whether the raised bed nearest the garden would ever drain and dry out. We weren't going to have a water feature but the way things were going, this bed was determined to be a pond no matter what.
The second was how on earth I was going to get any plants to grow in the lower beds where the soil was solid clay.
The third was re the large oak posts and rope that were going to form a sort of colonnade outside the kitchen door. I still couldn't picture them at all. These were an addition to my original plan (far too imaginative for me to think of) and whilst I really liked the concept I couldn't work out how they were going to look, how they would fit with the administrator tree etc.
|
|
We returned from Geneva (only a couple of days later) and the weather was dry and good progress had been/was being made.
The team could beaver away.
|
|
|
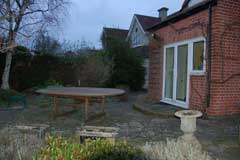
The edge of the main patio was laid this week so we could see where the table is going to go when it's all finished. |
|
|
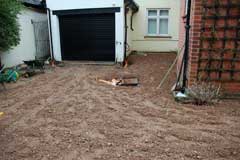
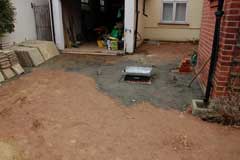
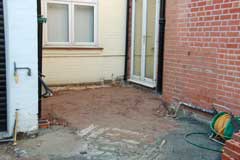
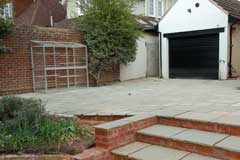
The space between the dining room door and the garage was struggling to dry out - no doubt it would eventually but my greenhouse couldn't go back here until this area had been paved and that seemed long way off. |
On the Friday, Nik came round for a site meeting and to discuss my concerns (see above).
Firstly - Paul will put some drain holes in the bed so the water will drain off towards the adminstrator (Indian Bean) tree
Secondly - Nik and team will dig the beds over and add lots of mushroom compost before adding the top soil
Thirdly - Nik shared my concerns and we cancelled the oak posts. We agreed that it would look much better without barriers.
|
|
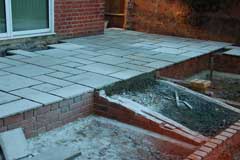
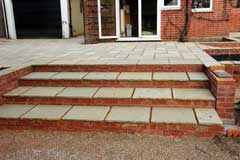
By close of play on that day, the first few slabs had been laid for the main patio and the steps down to the garden were beginning to take shape. Within the next couple of days, despite a return to wintery weather, the main patio was covered but a look around the corner showed there was still quite a way to go. |
|
|
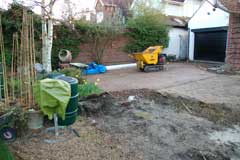
We were now approaching the end of March and good progress continues with the new ramps slabbed and the electrical work started. It was still a hive of activity with much head scratching about how the different levels were going to be addressed - the garage is considerably lower than the house for some reason! |
|
|
Only a couple of days later and the slope had been worked out and the paving started. One big problem ... where was the greenhouse going to go because there was no way it could go back where it came from - it would never cope with the slope. |
|
|
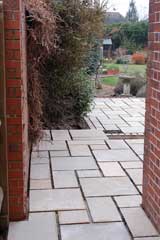
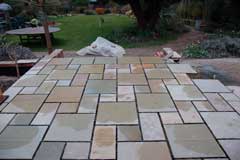
The paving looks lovely even when (especially when) wet! |
|
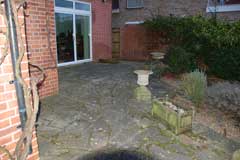
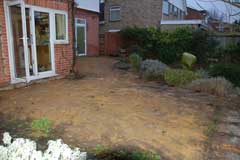
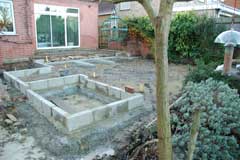
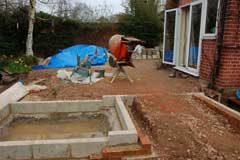
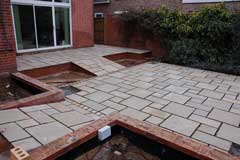
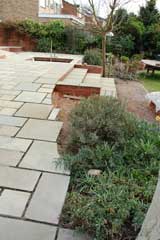
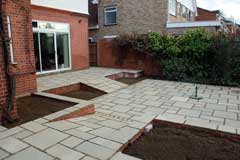
Another few days, we were now in early April, and the paving was all but done. The design was really coming together at this point and it was starting to look like a patio! |
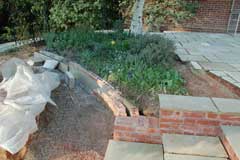
Paul started to rebuild the retaining wall in front of the woodland bed and Craig and Richard sorted out the top edge of that bed. They also re-did the original ramp and the steps were completely rebuilt. |
|
|
|
|
|
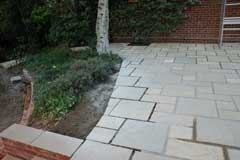
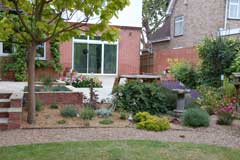
One of the most exciting bits (for me) was replanting the shrubs that had been dug up earlier. the camellia went into the silver bed (not that it's silver but there was a suitable sized gap). Old Man's Beard and Skimmia Japonica were two of the very few shrubs to survive. A few other shrubs were shuffled around from other parts of the garden - a hebe, choysia and a privet to name but 3. There was still quite a bit more space to fill with shrubs so the garden vouchers and I would make a trip to the garden centre before too long! |
|
We put the table base in the right place and Craig sorted out the curve at the top of the woodland bed. |
|
|
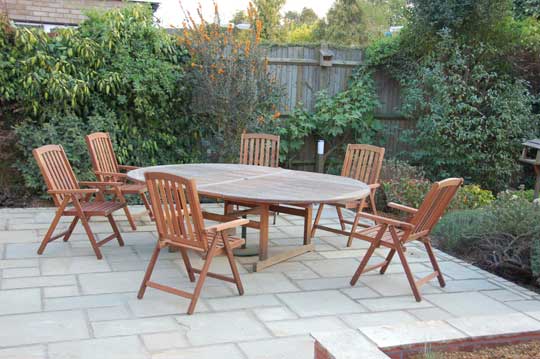
Paul and the plasterers (see Small Guest Room!) helped us move the table back into position. Oh happy day - we could eat outside and the April weather was so kind to us we could take full advantage of it! |
|
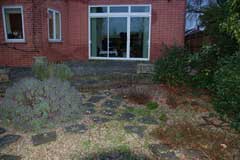
I planted the two raised beds with grasses from around the garden - both of them are the same and both symmetrical (most unusual for me but a treat for Jonathon). The grasses include a Juncus in the middle with a few Festuca Glauca Elijah Blue and Sysirinchium Striata around the edge. As you can see, the greenhouse found a new home and was quickly filled up. |
|
|
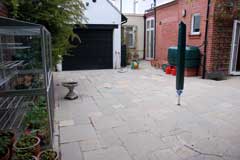
Finally, a few "before and after" photos to show where we started and where we've ended up! |
|
|
|
|
|
|
|
|
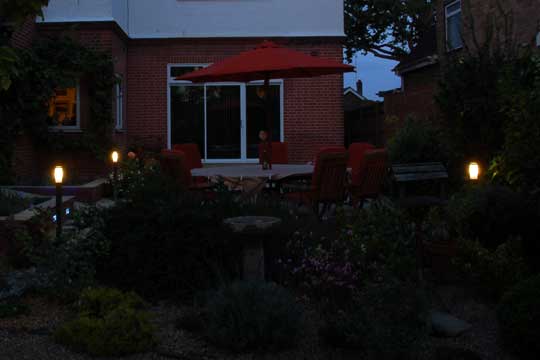
We light it up at night - very pretty! |
|
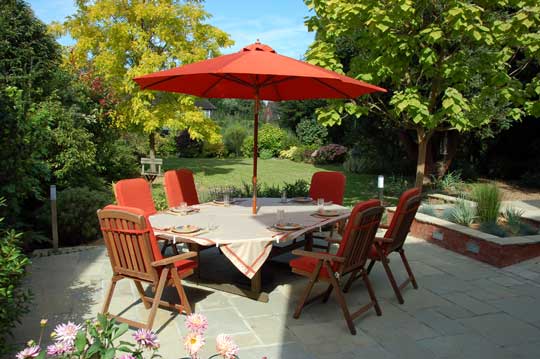
But this is what it's all about ... dining with friends and enjoying the sunshine (table cloth etc courtesy of Mum). |
|
We are really pleased with the end result and have already enjoyed sitting outside, admiring the garden and watching our wildlife visitors.
|
|